Tuesday, August 3, 2010

I'm the August Cover Girl!!!

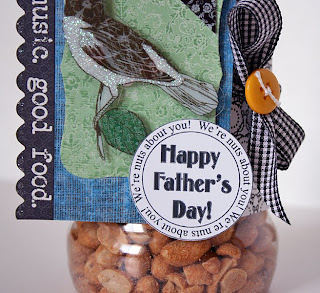
Someone pinch me! I feel so honored to have my little altered bucket featured on the front cover of the August 2010 Simply Handmade Magazine! This bucket is made using the Artsy Urban Collection from GCD Studios - I love everything about this line!

Last Thursday night I received a call from Heidi Sonboul saying - um did you know that you are on the cover of the August issue?!? Um no! I have been so busy with my kids that I haven't had any downtime (something I am sure most mother's can relate to). Anyway, the issue is out at stores now - so head out and grab yourself one!


Sunday, August 1, 2010

Some projects

Happy Sunday everyone! I hope you are enjoying an amazing weekend with your family! I know we sure have had a nice weekend filled with lots of laughs and memories - awh summer :)

Speaking of summer I never planned on being the mom that wished her kids were going back to school but I have to admit this summer has been a bit tricky with the 3 kiddos and I am really looking forward to a normal schedule again. Although with that being said I am sure I will be tearing up when it actually happens. (but the upside is that I will have lots more to share with you and craft for that matter since I will have more time to think about something other than playdates, swimming lessons, and entertaining kids 24/7 ;))

Today I have a few projects to share that I created using momenta products! (and since my family is waiting on me to head out for a bike ride - I will just share these quickly).

So here they are:

I used my unity stamps on this one . . .

Travel Notebook - awh I wish I was on a cruise right now . . .


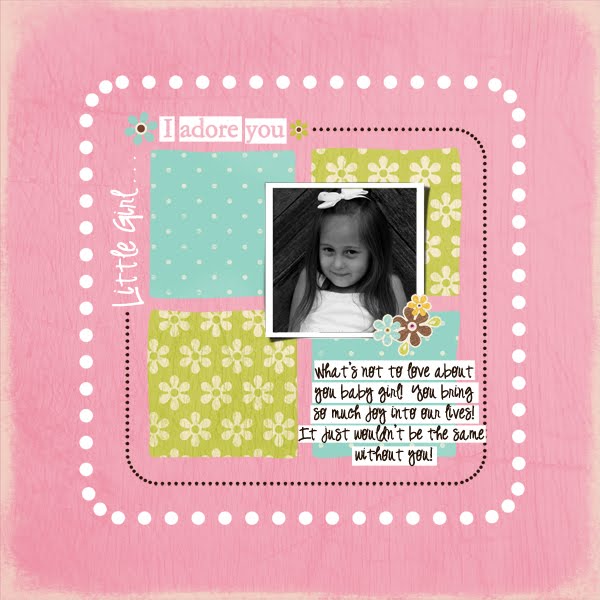
A layout:
A gift set . . .


And a card . . .
Enjoy the rest of your weekend! Lots coming this week (I promise) so check back :)


Tuesday, July 6, 2010

Let's make a scrabble pendant!

My daughter loves jewelry! She seriously loves jewelry - no joke. My husband and I are always teasing that we pity the guy that dares to marry this little princess because he is going to have very empty pockets :) (something my husband can attest to ;))

With my daughter's birthday coming up I was thinking about favors that we could make together to give out to her friends (who all happen to also love jewelry *smile) armed with her help, some awesome GCD Studios paper, and a few key supplies - Ashlee and I sat down to create some scrabble pendants we hope her friends adore!

So if you have ever wondered how to create these little scrabble pendants - you are in luck because I am going to show you how to do it today!

Supplies Needed:


Mod Podge
Craft Scissors
Exacto knife
Jewelry Bail
Diamond Glaze
A Pin
A good quality paint brush
E-6000 glue (or other jewelry glue)
Scrabble tile

Step 1:Choose your paper or design a design of your own using photoshop. I choose to cut out a heart from one of the GCD Papers lines called Zippity (#419 Hearts).


Step 2:
Apply an even layer of mod podge to the backside of the scrabble tile (the side without the letter) and place your paper on top. Let it dry and then using your exacto knife cut around the outside edges to make it even with your tile.


Step 3:
Apply a thin even layer of mod podge over the top of the tile to seal the paper onto the tile. Allow to dry.


Step 4:
Now apply a good amount of diamond glaze to the tile. Start in the outer edges going completely around in a square and then fill in the middle. Be careful not to leave bubbles. If you do get a bubble - use a pin to poke it out.


Step 5:
Allow it to dry overnight or for several hours. This is important as it can take several hours for it to completely harden.

Step 6:

The next day or several hours later add the jewelry bail to the back using E-6000 glue (or other jewelry glue)


Here's the completed necklace (I decided to just purchase little chains at my local craft store):

These are not only super simple to make but they are (as my daughter would say) Sooo utterly fabulous - and a big hit for little girls!

So there you have it a super simple idea for a birthday gift or favor!

Have a super day everyone!

Friday, July 2, 2010

GCD Studios Newsletter and a Giveaway!!!

This week, we have one BIG give aways for our FUN News Letter!

Heidi and Heather in house just finished our July issue and it's ready to mail! We are so excited about it, because it's our best issue yet!

Here's how it works:
1)Sign up for the news letter here.... Inthestudio@gcdstudois.com
2)Then Leave a comment here over at GCD Studios Blog. (look for the post that says GIVE AWAY+ HAPPY 4th)

In the News letter you'll see the prize :)
Then on July 12th... Heidi will pick the winner!


I hope you all will enter!


Tuesday, June 29, 2010

Come sail away . . . bad blogger!

Hi Everyone! Summer is just crazy around here! So much going on and kids running in so many different directions! We also just got home from a extra long vacation - pictues coming soon (I hope) and I am also taking a photography class taught by the ever popular Karen Russell - trust me when I say she's an amazing teacher! Anyway, I wanted to get this little project up that I created using GCD Studios products - this was shared a few days ago on the GCD Studios blog:

* * * * * * * * * *
Today's is my turn to show you my take on this month's theme:


When I first saw these images I was drawn to the boats. Summer time for me is all about water, water sports and nice lazy vacations. There is something (for me anyway) just magical about a sail boat. I think on a nice day there is nothing more beautiful then watching a sail boat sail off until you can no longer see it.


Recently, I was at my local craft store and I stumbled across this little unfinished boat I was drawn to it and knew I had to take it home. After painting my little boat white, I paired it with some yummy GCD papers to make the sails.


Here's my little Sail Boat:


Well I wish you each smooth "sailing" today! Have a happy day!

Wednesday, June 9, 2010

Summer time and the days are busy!!! Father's Day gift idea using GCD Studios

I don't know about you all but the days are just flying around here - I haven't had a minute to even create or post on my blog lately! Summer can be so challenging :) Anyway, here's a project that was shared a few days ago on the GCD blog - I hope you enjoy it :)


With Father's Day right around the corner it's likely that you are wracking your brain trying to figure out a gift for that special guy in your life. If you are anything like me, you're busy and sometimes finding the special gift gets accidentally pushed off until it's a bit too late.

I created this project for all of my procrastination friends :) Here's a quick little "man" gift (equivalent to a man picking up flowers) that with just a few key supplies he'll think you had this planned for days :)

Supplies Needed:
~ jar of nuts - any kind
~ GCD Studios Papers and Embellishments (I used Artsy Urban - it has great colors that are perfect for men).
~ Adhesive
~ Trimmer
~ Scissors
~ Ribbon
~ Printed Digi Stamp (I am sharing the one I created here in this post - so grab it for free!)

Here's the completed altered Jar:
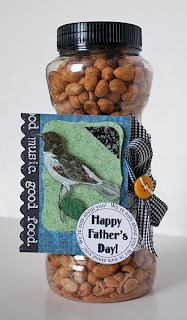


So have you been wondering how you could create your own digital stamps? Well I am going to show you how using Photoshop CS3. Here's how I created the one I used on this little altered can.


Step one: Open a new file in photoshop. Size it at about 2x2 inches.


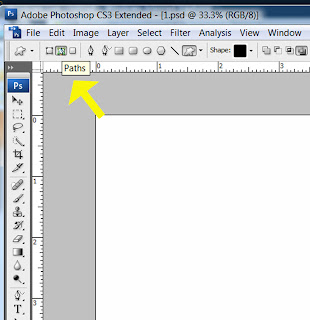
Step two: In the tool bar on the left hand size click on the custom shapes button and then at the top of your page click on the "paths" (see arrow)


Step 3:


From the pull down menu select any shape you wish. Your stamp will take on this shape - so choose one that you like.
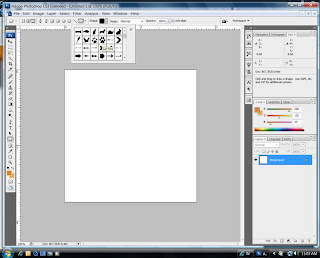


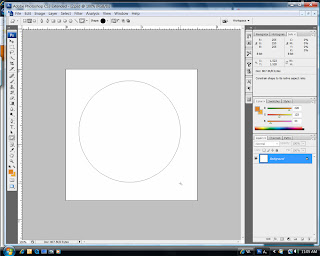
Step 4: (I selected a basic circle) now draw out the shape onto your workspace - it will look like this when you are done.


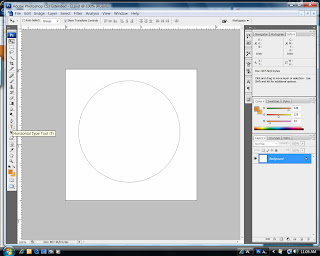
Step 5: On the left hand side toolbar select your text button and click on the outside of your drawn out shape and start typing.
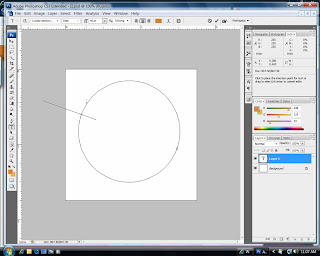


Step 6: You can adjust the size at the top using the basic sizing tools.

Step 7: (optional): I formed another layer and typed in "Happy Father's Day" in the center. I also drew out a few other circles using the basic "stroke" function to add a bit more interest to my stamp - here's the completed stamp. Now all I have to do is print and punch it out using my spellbinders or hand punch.
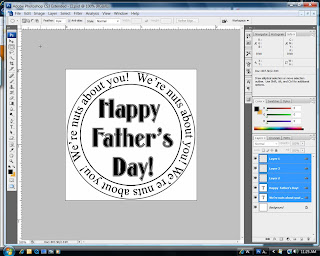

Do you like this digital stamp? Click HERE to download it for free!


Happy creating!



Monday, May 31, 2010

Happy Memorial Day - and a few projects to share!

Happy Memorial Day everyone! I hope you are enjoying some quality time with those you love the most!

So far we have had a super fun day. We headed out really early this morning so that my hubby could run in the Bolder Boulder which is a 10K race. He reached his goal coming in well under an hour - so proud of you honey!

This race was CRAZY - and so crowded so I only was able to capture this one photo of him after the race:


Afterwards we headed over to a BBQ with some family and now we are finally home. I wanted to share a quick post of a few projects using Momenta products.

Here's a digital layout: (this digital kit will be available in the store soon):

Cards are super simple to put together using Momenta pre-folded cards, cardstock and embellishments:


My son and daughter will be having a swimming birthday party in just a few weeks - I used some product to alter some soda bottles and make some invites:


I was also lucky enough to get to play with their new Valentine Line that is coming out - here's a sneak peek of this upcoming line:


Well we are going to wrap up the night watching a movie together - enjoy the week everyone!