


I will leave you all with a picture of my kiddos this was part of our Christmas card this year:

I hope that all is Merry and Bright in your lives and I wish you all the best going into the new year!


 Step 1: pour a good amount of salt on your plate.


For the finishing touches I used the cricut Mini Monsters cartridge, some GCD Paper (backsides from various lines) some vinyl and googley eyes. Here's my completed project:


Step 2: Cover chipboard in Embossing powder and heat until it melts (will look like metal)
Step 3: While it’s still hot quickly add another layer of embossing powder and heat – repeat this process 3 more times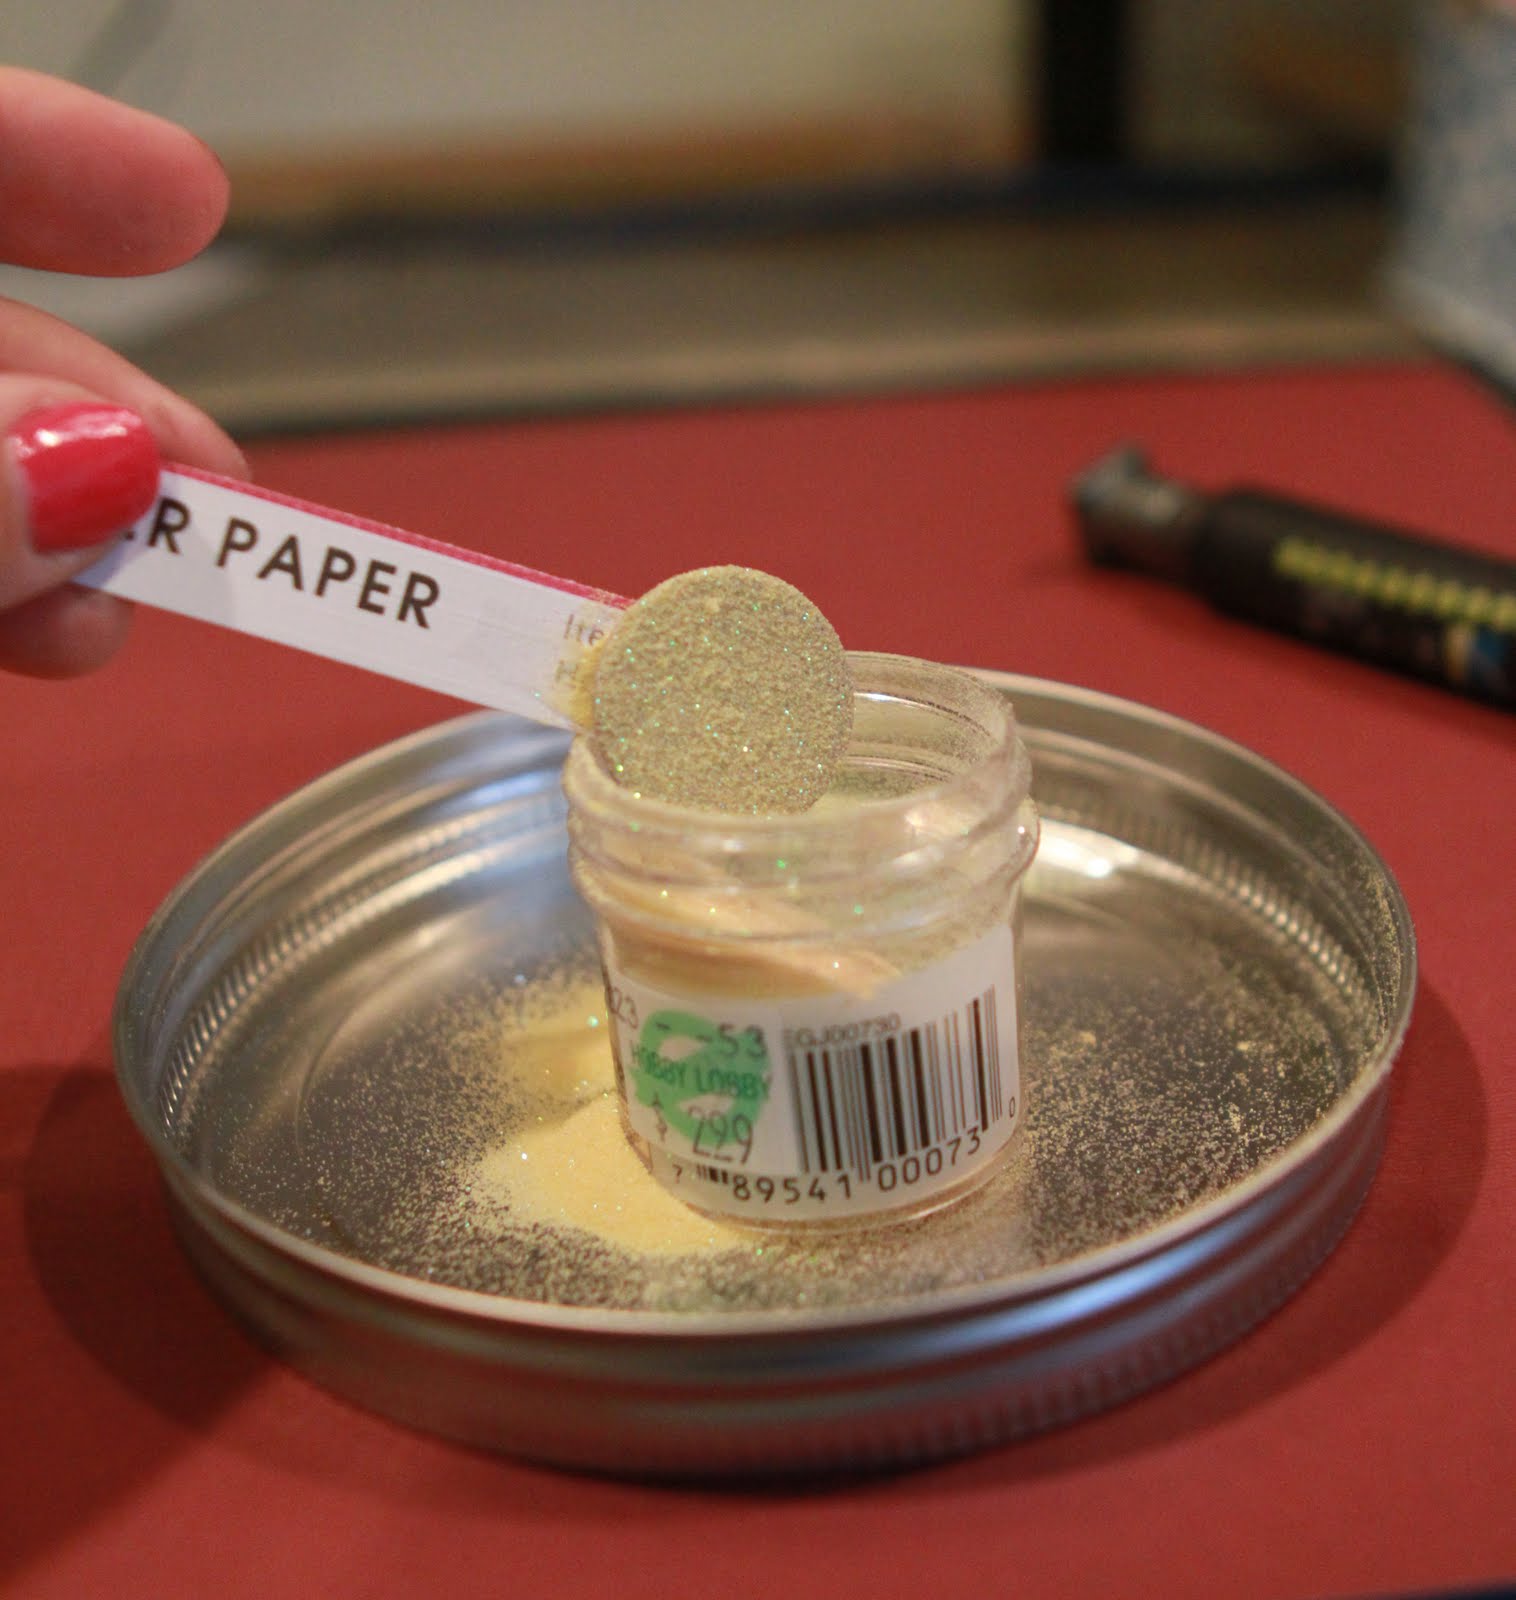
Step 4: Now take the chipart tool and stamp it into the versa mark ink – set aside and cover the chipboard 1 last time in embossing powder and heat. Step 5: While the embossing powder is still hot take the chipArt tool and place it into the center of the chipboard and press down lightly and wait until it cools to remove it and you will have a nicely monogrammed chipboard piece.
And here's my finished jewelry box with my little "A" monogram: I hope this gets your head spinning about all the possibilities of this tool!
Have a super crafty day everyone!


Ashlee is growing like a weed and starting first grade this year. This is her first year attending school all day long. I am pretty sure she is going to come home pretty tired today. I took so many photos of her today because she's not "TC" (as defined by Jackson too cool) yet - LOL. However, because these are my kids and I am a protective Mama I have decided not to post any of her photos at her school. But here's a few SOOC (straight out of camera) shots of her this morning.
 This last one makes me giggle! I told Chad that I am going to start sharing more of our "real moments" here - and this was such a real moment this morning. Not always smiles but it's all good :)
 So after dropping the kids off for their first day Gavin, Chad and I headed to McDonald's for breakfast! A little "celebration" of sorts if you will :) Gavin was sure happy to have alone time with Mom and Dad - what a treat! He even pulled it over on Chad convincing him to slurge $2 on this little McDonald's toy (insert eye roll here).
 Well it looks like I am going to have to get moving so I can actually accomplish something today.


Step 2:
Using your ruler find the center point and draw a line from one point to the opposite point and then do it again to the other side (so you end up with and x on your paper) (oh and do this on the side that will not be showing ;))

Step 3:
 Cut along the lines making sure to leave enough space in the center to fold up the sides.
Step 5: Punch holes in the center and on one of each of the opposite corners.
Step 6:
On the non-pointed side cut off some floral wire and wrap it around the top. Add a round bead to the top (this is how your pinwheel will spin).
 Step 7:
Put the wire through the center of the paper and fold up the corners by putting the wire through the holes to secure.
 Step 8:
Attach another round bead to the center and pull up the remaining wire and then tuck back into the bead to secure.

Step 9:
On the pointed end add on the taffy by poking a hole into the taffy and "threading" it up onto the stick. When you are done adding the taffy cut off the pointed end with your scissors (to prevent small children from getting hurt). Tie a ribbon on the bottom and you are done.
 There you have it - a super simple idea to brighten someone's day!
Have a super day everyone!