So today I decided to make a tile for my kitchen and while doing it I thought I would go through a few steps on how I create my vinyls, cut them, and transfer them evenly.
Step 1: When designing a tile, wall art, or other vinyl project I always use cricut design studio. For me this software is essential…and I am slightly addicted to it. In design studio for this tile I selected a 12x24 size mat…I did this because today I am actually using some vinyl from Provo craft and it comes already cut in this size. Normally I would just select a 12x12 size mat and cut some “store” vinyl (as I get vinyl scraps from local sign stores in my area…most stores will sell you their scraps for next to nothing…and these work just as great as the Provo craft vinyl). I then simply played around with the various cartridges that I have in my growing collection…size it so that it fits just under the 12 inch mark on the sides and on the top…I do this to ensure that everything will cut properly.
Step 2: Load your vinyl onto your mat…plug your machine to your computer…and you are set to cut. Turn the speed dial down to low and your pressure dial down to low and cut away.
Step 3: If you cut a 12x24 I will then take the vinyl to my trimmer and trim off the extra 12 inches so that I don’t damage the remaining vinyl. I will then start the “weeding” process. Grab a sharp pin (the sewing kind) and some sharp scissors (like cutterbee). I will usually start by removing all of the “insides” such as the inside of and “e”. These are easy to remove with your pin by poking slightly and pulling up to remove the centers. After I have all of the centers out I will start to remove the rest of the extra vinyl around the letters…BE CAREFUL…it can tear…so go slow and take your time.
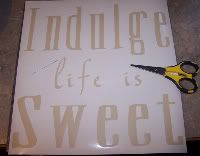
Step 4: After you have all of the excess vinyl off take some transfer tape (if you don’t have transfer tape you can use contact paper (just be careful when doing step 5…as it will leave a residue if you push it on too good). Place the transfer tape onto the top of your design so that the letters/design is completely covered.
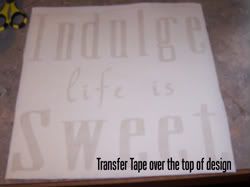
Step 5: Turn over your vinyl with the transfer tape facing down (grid side up) and take a scraper…I am using my pampered chef scraper…you know the one that comes with the stone for cleaning…it’s perfect for this! And scrape the back…you will start to see a outline of the letters…basically you are transferring the letters to the sticky tape (think of it like reverse printing from your printer).
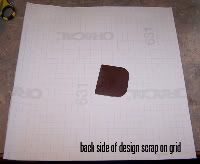
Step 6: Now peel back the grid side slowly…make sure that all letters/design is stuck to your transfer tape.
Step 7: Place your transfer tape with your design down onto your tile…be careful to get it lined up correctly…(once down it can’t come up or it may rip) and scrape lightly on top of the transfer tape to complete the transfer to your tile!
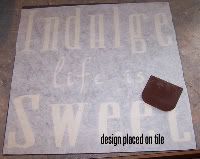
Woohoo you did it!

I saved this design (cut) and uploaded to media fire…click here if you would like to have it! (Note: I used Jasmine and stamped cartridges)





5 comments:
Wow...how helpful! Thanks for answering so many of my questions!
VERY NICE Jennifer!
Very nice! You should enter this in the Great American Vinyl Contest at www.PrintOnIt.com.
Thank you for taking time to show a great project with vinyl. It is so popular and your design looks great!
Thanks very much for your good explanation. Love the saying! This will help me a lot!
Post a Comment