With Father's Day right around the corner it's likely that you are wracking your brain trying to figure out a gift for that special guy in your life. If you are anything like me, you're busy and sometimes finding the special gift gets accidentally pushed off until it's a bit too late.
I created this project for all of my procrastination friends :) Here's a quick little "man" gift (equivalent to a man picking up flowers) that with just a few key supplies he'll think you had this planned for days :)
Supplies Needed:
~ jar of nuts - any kind
~ GCD Studios Papers and Embellishments (I used Artsy Urban - it has great colors that are perfect for men).
~ Adhesive
~ Trimmer
~ Scissors
~ Ribbon
~ Printed Digi Stamp (I am sharing the one I created here in this post - so grab it for free!)
Here's the completed altered Jar:
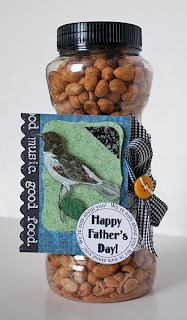
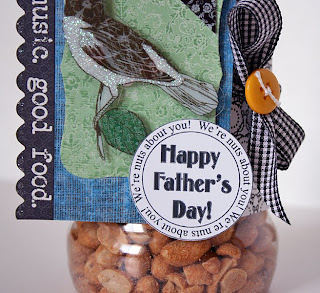
So have you been wondering how you could create your own digital stamps? Well I am going to show you how using Photoshop CS3. Here's how I created the one I used on this little altered can.
Step one: Open a new file in photoshop. Size it at about 2x2 inches.
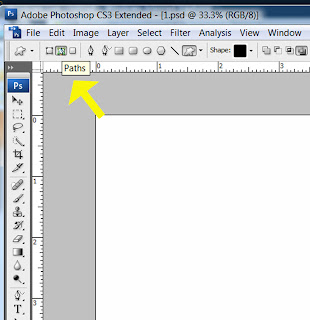
Step two: In the tool bar on the left hand size click on the custom shapes button and then at the top of your page click on the "paths" (see arrow)
From the pull down menu select any shape you wish. Your stamp will take on this shape - so choose one that you like.
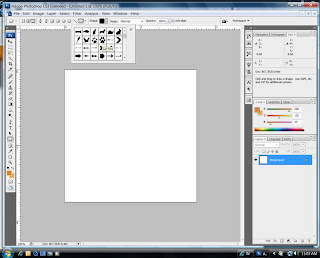
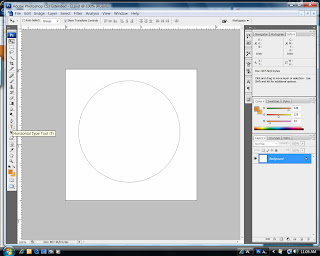
Step 4: (I selected a basic circle) now draw out the shape onto your workspace - it will look like this when you are done.
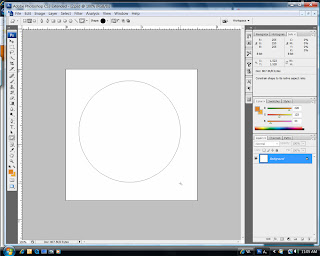
Step 5: On the left hand side toolbar select your text button and click on the outside of your drawn out shape and start typing.
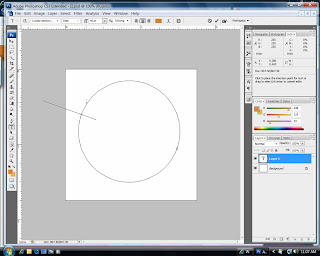
 Step 6: You can adjust the size at the top using the basic sizing tools.
 Step 7: (optional): I formed another layer and typed in "Happy Father's Day" in the center. I also drew out a few other circles using the basic "stroke" function to add a bit more interest to my stamp - here's the completed stamp. Now all I have to do is print and punch it out using my spellbinders or hand punch.
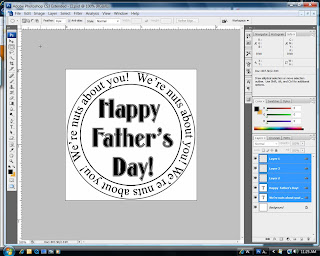
Do you like this digital stamp? Click HERE to download it for free!


2 comments:
Cute!!! Can' go wrong with a jar of nuts :D
this is so cute, thanks for sharing how you did it!
Post a Comment